Unlock Delicious Chocolate Spritz Cookies: Expert Dough & Pressing Secrets
The holiday season is synonymous with warmth, joy, and the irresistible aroma of freshly baked cookies. While classic spritz cookies hold a special place in our hearts, imagine elevating that cherished tradition with a rich, decadent chocolate twist.
Chocolate spritz cookies offer all the charm of their vanilla counterparts with an added layer of cocoa-infused delight, making them an unforgettable treat for any occasion, especially during festive gatherings or a special milestone like a 90th birthday celebration! But achieving those perfectly formed, melt-in-your-mouth chocolate shapes isn't just about a great recipe; it's about mastering the art of dough consistency and cookie press technique. Let's dive into the secrets that will transform your baking from good to truly great.
The Magic Behind Perfect Chocolate Spritz Cookies: Dough Consistency is Key
The foundation of any spectacular spritz cookie lies in its dough. For
chocolate spritz cookies, this is even more critical, as cocoa powder can subtly alter the dough's texture. A cookie press demands a specific consistency – one that's firm enough to hold intricate shapes, yet pliable enough to flow smoothly without resistance.
Our journey to perfect dough begins with the dry ingredients. In a medium bowl, whisk together your all-purpose flour, rich cocoa powder, a touch of baking powder (which helps with a tender crumb), and a pinch of salt. The salt isn't just for flavor; it balances the sweetness and enhances the chocolate notes.
Next, the wet ingredients take center stage. In a large mixing bowl, beat softened unsalted butter with a combination of granulated sugar and brown sugar. The brown sugar adds a wonderful depth of flavor and a slight chewiness that complements the chocolate beautifully, distinguishing these from a standard sugar cookie. Beat this mixture on medium-high speed until it’s light, airy, and fluffy – this creaming process incorporates air, contributing to the cookie's delicate texture.
Once your butter and sugars are perfectly creamed, incorporate pure vanilla extract for that essential aromatic base. Then, add large eggs, one at a time, beating thoroughly after each addition. This ensures the eggs are fully emulsified, creating a smooth, cohesive batter.
Now comes the crucial step: gradually add your dry flour mixture to the butter mixture, mixing only until a smooth dough forms.
The key here is not to overmix, which can lead to tough cookies. And unlike many cookie doughs,
do not chill this chocolate spritz cookie dough immediately after mixing. The goal is to work with dough that is at the proper room temperature – not too cold, which makes it stiff and difficult to press, and not too warm, which can cause it to spread excessively. If you find your dough has become too warm during preparation, a brief stint (5-10 minutes) in the refrigerator can bring it back to the ideal pressing temperature, making it responsive and cooperative.
Mastering the Cookie Press: Techniques for Beautiful Shapes
A cookie press is an indispensable tool for spritz cookies, allowing you to create an array of charming, consistent shapes with ease. But like any craft, it requires a little technique. For more in-depth advice on your press, consider consulting
Mastering Chocolate Spritz Cookies: Cookie Press Tips for Perfect Holiday Treats.
First, let's talk about your baking surface. It is absolutely paramount to use an
ungreased, cool cookie sheet. Greasing your pan will cause your delicate chocolate spritz cookies to spread and lose their intricate definition, turning your beautiful shapes into amorphous blobs. Ensure your baking sheets are cool to the touch; if they're warm from a previous batch, let them cool completely or swap them out.
Using the cookie press itself is straightforward:
- With clean hands, roll a portion of your room-temperature dough into a log and carefully fill the barrel of your cookie press.
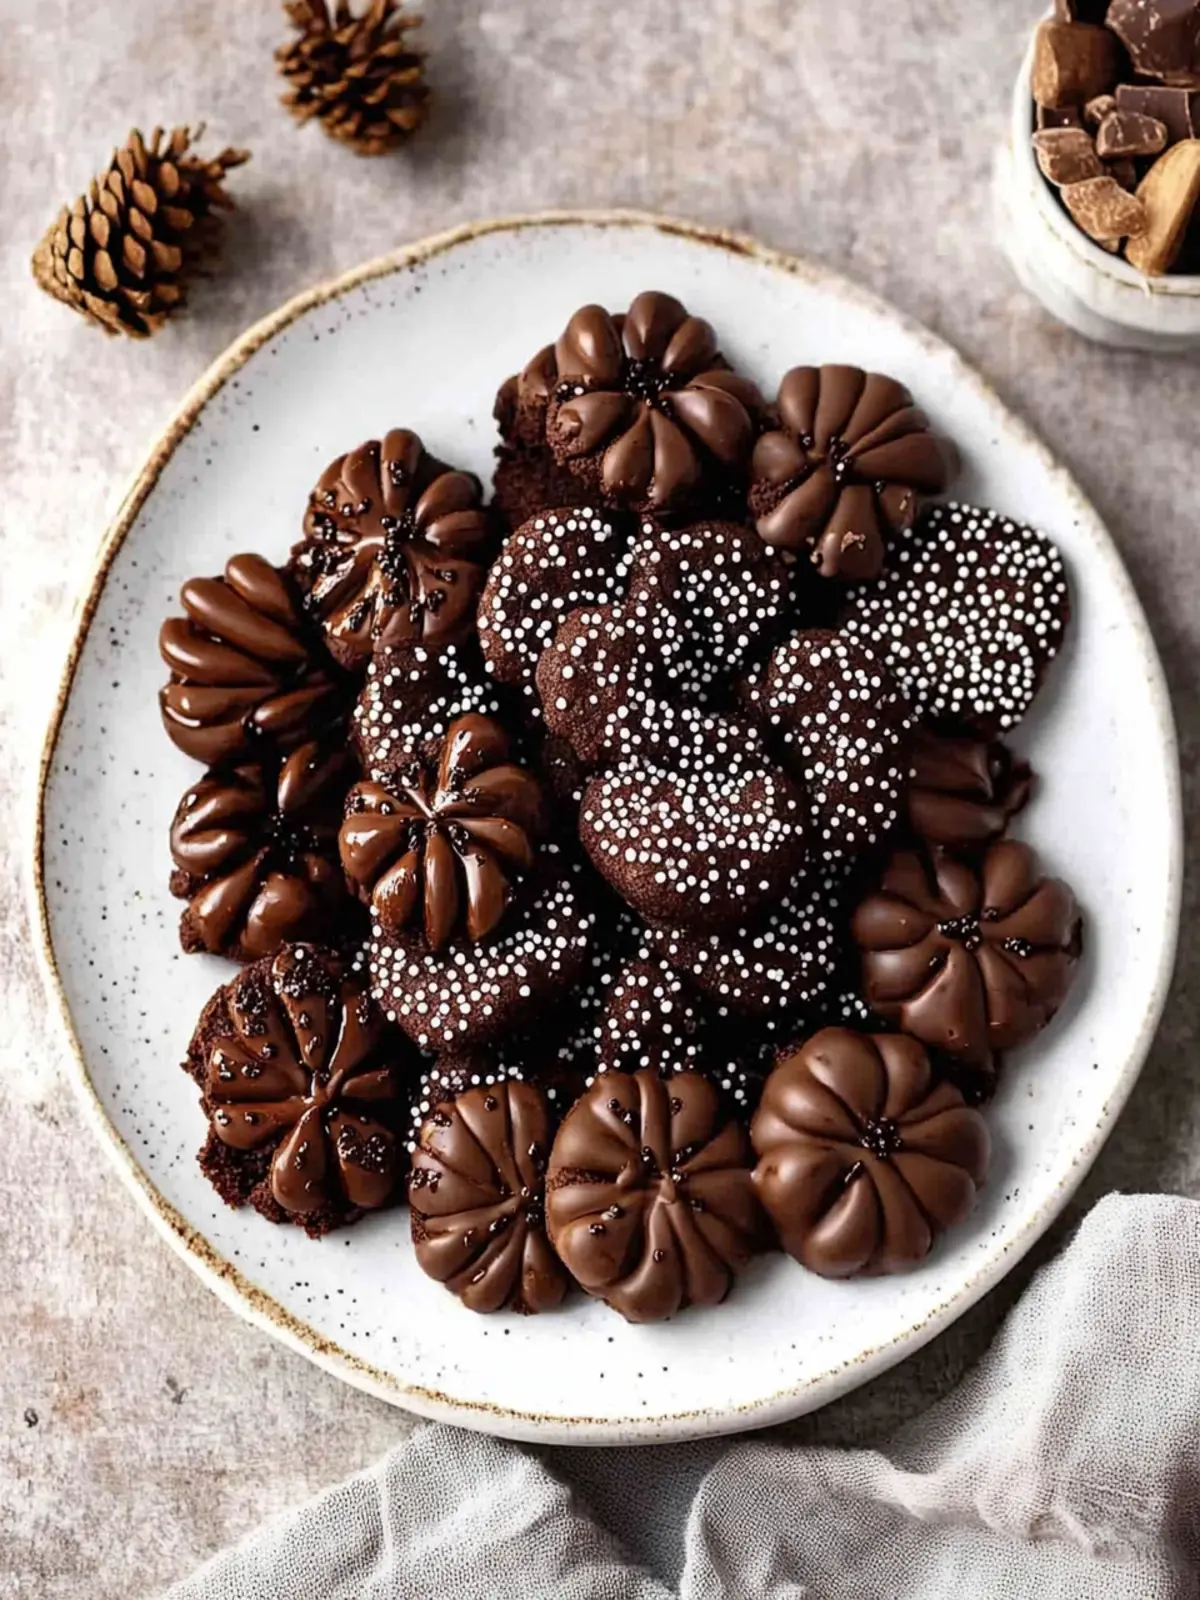
- Select your desired cookie disk – from classic stars and trees to festive flowers – and place it into the base of the press, smooth side up.
- Screw the base securely onto the barrel.
- Give the plunger a couple of initial presses to help push the dough down and eliminate any air pockets.
- Firmly place the bottom of the cookie press directly onto the cool, ungreased cookie sheet. Apply steady, even pressure and squeeze the trigger or lever once (or as per your press's instructions) to form a single cookie. Lift the press straight up.
If a cookie doesn't form perfectly, don't despair! Simply lift the imperfect dough off the sheet, roll it back into the remaining dough in the barrel, and reuse it. This helps minimize waste and maximizes your delicious yield. For consistent baking, it’s a good practice to bake all the same pressed shapes on the same sheet, as different shapes can bake at slightly different rates.
Baking to Perfection: Achieving that Ideal Spritz Texture
Once your ungreased cookie sheets are filled with charming raw
chocolate spritz cookies, it's time to bring them to life in the oven. Preheat your oven to a precise 350°F (175°C). An accurately calibrated oven is crucial for even baking.
Carefully transfer your cookie sheets to the preheated oven. Bake for approximately 8-10 minutes, or until the cookies are just set. Unlike vanilla spritz, the dark color of chocolate spritz cookies makes it a little harder to see browning, so rely more on the firmness when gently touched and the subtle fragrance filling your kitchen. They should look firm and slightly matte. Overbaking will lead to dry, crumbly cookies, so it's better to underbake slightly than overbake.
As soon as they are done, remove the cookie sheets from the oven and place them on a wire cooling rack for a brief 2-minute cool-down. This allows the cookies to firm up slightly before you attempt to move them. After this initial rest, carefully transfer the cookies directly from the cookie sheet to the cooling rack to cool completely. This prevents residual heat from overbaking them and ensures they achieve that perfect delicate crispness that defines a great spritz cookie. For more ideas and a complete guide, check out
The Ultimate Chocolate Spritz Cookie Recipe for a Festive Holiday Season.
Elevating Your Chocolate Spritz Cookies: Decoration & Storage
The beauty of
chocolate spritz cookies isn't just in their taste but also in their delightful appearance. Decoration is a fantastic way to personalize your batch and make them even more festive.
You have two main opportunities for decoration:
- Pre-Baking Sprinkles: Before baking, while the cookie dough is still soft on the baking sheet, sprinkle your choice of festive decorations. Nonpareils, jimmies, sparkling sugar, or sanding sugar sprinkles all adhere beautifully during the baking process, adding a delightful crunch and visual pop. Consider contrasting colors, like white sanding sugar or red and green nonpareils for holidays.
- Post-Baking Embellishments: Once your cookies are completely cool, the possibilities for extra flair are endless. You can melt Candy Melts candy in various colors and pipe additional designs, drizzles, or outlines onto your cookies. A simple dot of a contrasting color Candy Melt or a mini M&M in the center of a flower-shaped spritz can add a charming focal point, just like the request for Great Aunt Sara's special cookies! Peppermint extract can be added to white chocolate for a festive minty drizzle, or a touch of orange zest can brighten a dark chocolate glaze.
Proper storage ensures your hard work pays off for weeks to come. Store your baked
chocolate spritz cookies in an airtight container at cool room temperature. They will remain fresh and delicious for several weeks, making them perfect for gifting or enjoying over time.
For make-ahead convenience, spritz cookie dough can be frozen for up to 2 months. Form the dough into a log, wrap it well in plastic wrap, and then place it in a freezer-safe bag. When you're ready to bake, let the dough thaw completely in the refrigerator overnight, then bring it to room temperature before using it in your cookie press. You can also freeze baked cookies in an airtight container for up to two months. Simply thaw them at room temperature before serving.
Crafting perfect
chocolate spritz cookies is a delightful baking adventure that combines precision with creativity. By understanding the nuances of dough consistency, mastering your cookie press, and embracing simple baking and decorating techniques, you'll be well on your way to creating batches of these irresistible cocoa-infused treats. Whether for a holiday platter, a special birthday, or just an everyday indulgence, these cookies are sure to bring smiles and satisfy any chocolate craving. So gather your ingredients, prepare your press, and get ready to unlock a world of delicious, beautifully shaped cookies!